Tuesday, April 28, 2009

Birthday Banana Cake

Like so many bakers, one of the greatest joys I get from baking is creating something that I can give to another person, offering them a present that comes not only from my heart, but from my hands. Artists and carpenters, potters and knitters, poets and farmers all can relate to this feeling, I'm sure. And while I enjoy picking up presents for my loved ones as I may find them in various shops and markets throughout my travels, what brings me the most happiness is to give a gift of a baked good from my very own kitchen. When I'm in a whimsical mood, I even like to think that my baked presents are doubly fine, since they're so copiously sprinkled with tenderness and affection.

But aside from my secret magic ingredients, whatever they may be, I also like to hand-pick a recipe based on the recipient, as I would any other gift. And since there is a special person in my life who is celebrating a birthday very soon, I wanted to find a dessert that he would especially savor: one that I found just for him. With that in mind, I searched for banana cakes (as it's for a birthday, I simply needed to make a cake of some kind; and since this particular person is so fond of banana bread, I wanted to find a cake with similar properties).
I found the following recipe, and with it I saw a long thread of comments celebrating the cake and the brilliance of the recipe. My experience with the cake was not far off from that of the commentators, but I would offer a possible alteration.

One primary remark about the cake was it's unrivaled moistness; while I won't dispute that, I found that the center of the cake was not so much moist as it was under baked. To avoid ruining the entire thing, I opted to leave the center as it was, and not over bake the perimeter. To remedy this, I think I would simply try a higher baking temperature, and monitor it closely to see what length of time in the oven works best. Other than this slight problem, the cake came out wonderfully. It boasted the perfect amount of banana flavor, and although the same could not be said of the frosting, the cake itself was not too sweet: one of the key elements of a strong banana bread. However, the frosting truly completed the cake, in my opinion.

It was a birthday cake that warranted second and third helpings, abundant praise, and a grateful hug from the birthday boy. With reactions like that, I would certainly try this cake again, experimenting a bit more, but with a general security in its delicious outcome.

Banana Cake

Ingredients:
Cake:
1 1/2 cups bananas, mashed, ripe
2 teaspoons lemon juice
3 cups flour
1 1/2 teaspoons baking soda
1/4 teaspoon salt
3/4 cup butter, softened
2 1/8 cups sugar
3 large eggs
2 teaspoons vanilla
1 1/2 cups buttermilk
Frosting:
1/2 cup butter, softened
1 (8 ounce) package cream cheese, softened
1 teaspoon vanilla
3 1/2 cups confectioners' sugar
Chopped walnuts

Directions:

1. Preheat oven to 275°. Grease and flour a 9 x 13 pan.
2. In a small bowl, mix mashed banana with the lemon juice; set aside.
3. In a medium bowl, mix flour, baking soda and salt; set aside. In a large bowl, cream 3/4 cup butter and 2 1/8 cups sugar until light and fluffy. Beat in eggs, one at a time, then stir in 2 tsp vanilla. Beat in the flour mixture alternately with the buttermilk.
4. Stir in banana mixture.
5. Pour batter into prepared pan and bake in preheated oven for 1 hour or until toothpick inserted in center comes out clean. Remove from oven and place directly into the freezer for 45 minutes.
6. For the frosting, cream the butter and cream cheese until smooth. Beat in 1 teaspoon vanilla. Add icing sugar and beat on low speed until combined, then on high speed until frosting is smooth. Spread on cooled cake. Sprinkle chopped walnuts over top of the frosting, if desired.

Monday, April 27, 2009

Not-So-Bad Lemon Bars

Once upon a time, there was a magical recipe for the most luscious lemon bars in all the land, and I had access to this brilliant recipe card, and the treasure that could be created from its contents. These lemon bars were foolproof, they were creamy and sweet and tart and a joy to consume. Of course, I have no idea where that recipe has disappeared to, but I've intermittently spent the rest of my days searching for a lemon bar recipe that replicates this long-lost culinary jewel.

Unfortunately, I have not quite succeeded.

That seems like an awfully unfair thing to say here, as I follow with a recipe for lemon bars that I made recently; like telling a child that although his drawing is passable and may take up space on the refrigerator for a few days, it will never live up to his dead older brother's masterpiece painting, which is now hanging in the living room above the sofa.

Perhaps that isn't the most precise analogy...the lemon bars below are more than simply passable; they are quite good – tangy, light, and refreshing – though they still are not the lemon bars I was searching for. They would make any bake sale or picnic a bit more cheerful, with their bright yellow hue and lovely lemony aroma. But I'm not sure that I would bake them again, knowing that the bar I am looking for is still out there. However, I feel responsible for putting this recipe out there, as one I have tried. These bars are very simple to make and have quite a low-key ingredient list; a trip to the grocery store is most likely not even needed to make these, so they would be a perfect last-minute dessert to put together if guests were coming over or if they were needed for an emergency surprise party.

Lemon Bars

Ingredients:
Cookie Base:
1 cup unsalted butter, melted
1/2 cup powdered sugar
2 cups unbleached all purpose flour
Lemon Filling:
2 cups sugar
4 tablespoons unbleached all purpose flour
1/2 teaspoon baking powder
4 eggs
6 tablespoons fresh lemon juice
1/2 teaspoon fresh lemon rind

Directions:

1. Preheat oven to 350 degrees. Mix together butter, powdered sugar and flour until well blended. Press mixture into the bottom of a 9x13-inch glass baking dish. Bake for 20 minutes.
2. Sift together sugar, flour and baking powder into a mixing bowl. Add eggs, lemon juice and lemon rind. Beat by hand or with electric mixer until well blended. Pour mixture over crust and bake for 25 minutes.
3. Allow bars to cool, then dust with powdered sugar and cut into squares.

Wednesday, April 22, 2009

Stress-free Lemon Coconut Chiffon Cake

In the past, the idea of throwing a “dinner party” has, for me, usually brought on an emotional combination of excitement and anxiety. The thought of having a house full of friends is very appealing, but the anxiety surfaced when I got caught up in overthinking the menu,the pre-party cleaning, the necessary amount of plates and silverware. I had always made dinner parties into hefty affairs, where the threat of a minor imperfection haunted me for days beforehand, even well into the party itself. I think this hostess distress is fairly common, but over the past several weeks, I've come to view “dinner parties” differently. What if, instead of worrying about how the apartment looked, I worry about nothing? What if, instead of obsessing over finding the ideal recipe for a main course, I obsessed over nothing? What if, instead of expecting something to go wrong, I expected nothing?

I've found this manner of dinner parties to me much more enjoyable and gratifying. Of course, there are times for the formal and nit-picked party, but I don't see why those should be the norm when having guests over. For me, I much prefer inviting a bunch of people over, cooking a lot of good food, and seeing where the evening might lead, hoping for nothing more than an entertaining night with friends.

And since for me, baking is a stress-reliever, as opposed to a stress-inducer, I decided to try a cake that I had wanted to make for some time, but hadn't yet had the proper audience. But the warm weather and a table full of friends prompted me to open up my copy of Baking Illustrated and try the Lemon Coconut Chiffon Cake. Although I pointedly did not stress over what they may have thought of the cake, I was still pleased when they smiled at their first bites and told me that it was absolutely wonderful: light, lemony, and moist.

Lemon Coconut Chiffon Cake

From Baking Illustrated

Ingredients:
Cake:
1 ½ cups sugar
1 1/3 cups flour
½ tsp. baking soda
½ tsp. salt
7 large eggs, 2 whole and 5 separated, room temperature
2/3 cups water
½ cup vegetable oil
1 tsp. vanilla extract
½ tsp. cream of tartar
Grated zest of 2 large lemons (about 3 tbsp.)
2 tbsp. strained lemon juice
1 cup lightly packed sweetened flaked coconut
Icing:
4 tbsp. (½ stick) unsalted butter, melted
5 tbsp. lemon juice
2 cups sifted confectioners' sugar

Directions:
For the cake: 1. Adjust the rack to the lower-middle position and heat the oven to 325 degrees. Whisk the sugar, flour, baking soda, and salt together in a large bowl. Whisk in the 2 whole eggs, 5 egg yolks (reserve the whites), water, oil, vanilla extract, zest, and lemon juice until the batter is just smooth.
2. Pour the reserved egg whites into another bowl and beat at low speed until foamy, about 1 minute. Add the cream of tartar and beat until the whites are very thick and stiff, just short of dry, about 10 minutes. Fold the whites into the batter.
3. Pour the batter into an ungreased large tube pan or bundt pan (9 inch diameter, 16 cup capacity). Rap the pan against the countertop a few times to rupture any air pockets.
Bake the cake until a toothpick inserted in the center comes out clean, about 55-65 minutes. Immediately turn the cake upside down to cool, and elevate it on a wire rack so that air can flow through the pan. Let the cake cool completely.
4. To unmold, turn the pan upright and run a knife around the pan's circumference. Use a skewer to loosen the cake. Invert onto a serving plate.
For the icing: 1. Beat the butter, lemon juice, and confectioners' sugar in a medium bowl until smooth. Let it stand 1 minute, then spread on the cake.

Monday, April 20, 2009

A Green Space of One's Own

Over the years, whether I was living in a college dorm, at home with family, or alone, I have consistently agreed with Virginia Woolf's assertion that a woman (or a man – an individual, in my opinion) must have a space of one's own. This, ideally, is a quiet space that is set apart from where the routine of day-to-day life takes place. It cannot be a kitchen or a bedroom, because in these places it is impossible to truly separate one's self from the entrapments of everyday life, and the roles that are played there; to find peace, and to allow creativity to flourish, there must be a specifically designated area where one can go: a spare room, a bench in a garden, a tree stump in the forest. The examples are endless, though still not always easy to find – especially when living in a city.

I'm still searching for the perfect space of my own here, but I'm pleased to find that I did not need to travel far to find a green space of my own. Luckily, my apartment had a delightful, small balcony, perfectly sized for a bistro table, a couple of chairs, and a selection of plants and herbs (although it is just the right size for a small bee hive as well, which would be simply ideal for me, the location isn't quite suited for it). But the herbs seem to be thriving in my little green space.
It was with a superfluous amount of excitement that I first brought home a lavender plant a couple of weeks ago, and my thrill hardly diminished as the lavender was followed by sage, thyme, and then rosemary. They go well with the potted pea plant, and I'm brainstorming on what else I can add to my pseudo-garden.

The reason, naturally, for my burgeoning herb collection is to have a host a fresh herbs at my disposal for spring and summer baking. My inaugural expedition into baking with fresh-picked herbs was with the following Rosemary Shortbread. Even if these cookies had turned out to be inedible (which was not the case at all), the fragrance that filled my kitchen as these baked in the oven would have been solely worth the effort. Fortunately, the cookies turned out wonderful – crumbly, buttery, aromatic. One sampler even gushed that these were, quite literally, some of the best cookies he had ever tasted.

If this recipe is any indication of what I have to look forward to with my herb garden, it is going to be a splendid season.

Rosemary shortbread

Ingredients:

3/4 sticks (6 tablespoons) unsalted butter, softened
1 tbsp. honey
1/4 cup confectioners' sugar
1 cup all-purpose flour
1/4 tsp. baking powder
1/2 tsp. salt
1 tbsp. chopped fresh rosemary leaves
Garnish: small rosemary sprigs

Directions:
1. Preheat oven to 350°F. and butter a 9-inch cake pan.
2. In a bowl with an electric mixer beat butter and honey with sugar until light and fluffy. In another bowl whisk together flour, baking powder, salt, and rosemary. Beat flour mixture into butter mixture until just combined.
3. On a lightly floured surface knead dough about 8 times, or until it just comes together. With floured hands press dough evenly into pan or mold. Press small rosemary sprigs on top.
4. Bake shortbread in middle of oven 20 to 30 minutes, or until pale golden, and let stand in pan for 10 minutes. While shortbread is still warm, loosen edges from pan with a small knife and invert onto your hand covered with a kitchen towel. Invert shortbread onto a cutting board and cut halfway through round along score marks. Cool shortbread on a rack.

Tuesday, April 14, 2009

Healthy(ish) Fudge Brownies

When I was younger, to make brownies meant a few simple tools, one or two supplementary ingredients, and the always-available red box of Betty Crocker brownie mix. Although I've long since become disillusioned with any dessert that comes from a box, there still is one brownie mix that I thoroughly enjoy: the low-fat No Pudge Fudge Brownie brownies. It's not due to obsessive calorie counting, or the misguided notion that “diet” desserts are acceptable substitutes for the real thing that I occasionally purchase this mix. When I crave a dense slab of chocolate with frosting and chocolate chips adorning the top, I know which recipes to pull off of the shelf, and I do so with loving anticipation. But when I want a chocolate treat that is a bit lighter in overall substance, and not so overly rich or thick, I know that the No Pudge brownies will satisfy that particular yearning, and do so without a bit of flavor or chocolatey indulgence lost. There is a time for both particular types of brownie, and I'm grateful to have each readily available.

This is why I was so excited to find the following recipe for low-fat brownies in the most recent issue of Body and Soul magazine. While I wouldn't say that these are “nutritious” brownies (and anyway, brownies are simply not supposed to be “nutritious,” full-fat or non), these certainly seemed to be a less heavy variation of the brownies I normally make from scratch, full of butter and oil. And when I tried the first warm bite of these brownies, with such a unique ingredient list, I was thrilled to find them similar to the boxed low-fat brownies that I so enjoy.

In addition to the brownies, I also experimented, for the first time, with making my own homemade whipped cream. It's safe to say that the fat in the heavy cream negated any of the “healthfulness” of the brownies, but that was just fine with me. Whipped cream-topped brownies – especially warm brownies – are a simply celestially blissful dessert, and I was much too caught up in the tastes and textures of my treat to be concerned with something as silly and unimportant as fat content.

Healthy(ish) Fudge Brownies

Ingredients:
4 tablespoons (1/2 stick) unsalted butter
2/3 cup natural unsweetened cocoa powder
1/2 cup whole-wheat pastry flour
1/4 teaspoon baking powder
1/4 teaspoon salt
1 cup sugar
2/3 cup sweet-potato puree
1 large egg
1 1/2 teaspoons vanilla extract
1/4 teaspoon instant coffee powder

Directions:
1. Heat oven to 350 degrees. Butter an 8-inch square pan; set aside. In a medium saucepan over low heat, melt butter. Remove pan from heat, and stir in cocoa. Let cool slightly.
2. Meanwhile, in a small bowl, whisk together flour, baking powder, and salt.
3. Stir in sugar and sweet-potato puree, then egg. In a small bowl, stir together vanilla and coffee until coffee is dissolved; add to cocoa mixture.
Add flour mixture to cocoa mixture and stir until no traces of flour remain. Spoon into prepared pan; smooth the top. Bake until surface of brownies looks barely dry and an inserted knife comes out with a few moist crumbs, about 20 minutes. Cool to room temperature before serving.

Homemade Whipped Cream

Ingredients:
1 cup heavy cream
1 tsp. vanilla extract
1 Tbsp. confectioners' sugar

Directions:
In a large bowl, whip cream until stiff peaks are just about to form. Beat in vanilla and sugar until peaks form. Make sure not to over-beat.

Friday, April 10, 2009

Easter Bunny Carrot Cookies

With Easter arriving this coming Sunday, all of the cooking shows, websites, and blogs are focusing on egg-and-bunny themed desserts. I've seen cakes, brownies, cookies, trifles, and cupcakes that have been coated in pastel colors and shaped to form various Spring creatures. I, of course, find all of these treats adorable. I think that as a new Easter tradition, instead of simply coloring eggs, I'm going to begin making egg-shaped Rice Krispies treats, dipping them in fine chocolate, and coating with pink and lavender and blue sprinkles.

What I've also noticed (it's difficult not to, really) are pages of recipes focusing on Spring ingredients: Spinach! Asparagus! Rhubarb! The list of fantastic seasonal produce is a long one, as I've pleasantly begun to discover, based on the local farmer's markets. I decided that I could come up with an unbearably cute Easter dessert, one that would be too pretty or too precious to actually eat. Or instead (as if I had to make a choice between one and the other...) I could make something that incorporated some of the flavors of the season. In that vein, I took a cue from the Easter Bunny and decided to make a carrot-based dessert.

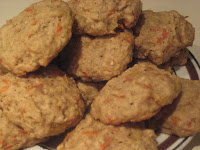
I found this recipe for Carrot Cookies, and I slightly modified some of the ingredients, and substantially lowered the sugar amount, allowing the vegetable and the pineapple to lend their flavors more than they would have otherwise. I like how the cookies turned out: light and fluffy. Very Spring-like, indeed. The only thing I would have done differently would be to experiment more with the spices; I think these could have benefited from a stronger kick of spice. Regardless, these are the perfect cookies to serve next to the towering rabbit cake or the Easter-egg colored frosted brownies on Easter day.

Carrot Cookies

Ingredients:
2 ½ cups whole wheat flour
1 tsp. baking soda
½ tsp. baking powder
½ tsp. ground cloves
2 tsp. ground cinnamon
¼ tsp. salt
1 ½ cups quick oats
¾ cups dark brown sugar
½ cup granulated sugar
2 sticks (1 cup) salted butter, softened
2 large eggs
2 tsp. vanilla extract
2 cups grated carrots
½ cup crushed pineapple, drained
1 cup chopped walnuts

Directions:
Preheat oven to 350 degrees.
In a medium bowl, combine flour, baking soda, baking powder, cloves, cinnamon, salt, and oats. Mix well with a whisk.
In a large bowl with an electric mixer, blend sugars. Add butter to mix.
Add eggs and vanilla and beat at medium speed until light and fluffy. Add carrots, pineapple, and nuts and blend until combined.
Add flour mixture and blend at low speed until just combined. Do not overmix.
Drop by rounded teaspoons onto ungreased baking sheets, about 1 ½ inches apart. Bake 14-15 minutes, but do not brown. Cool completely on wire racks.

Monday, April 6, 2009

Chocolate Toffee Pie

I first made this Chocolate Toffee Pie when I was fifteen years old, as a final project for my high school elective culinary arts class. I know I have made the pie once or twice since then, but I can't remember the last time I did, so it must have been some time ago. The recipe is one of the double-starred ones in a Mrs. Field's cookie cookbook that I've had, obviously, for years. The book has been through a lot, traveling from Connecticut to Brooklyn to Seattle, being exposed to spills, splatters, and an unintentional singe or two. It's marked up with a standard amount of notations and ratings, and it's a book that I consult when I am looking, especially, for an interesting cookie to bake. Of course, it also contains a well-researched (on my part) selection of other desserts, including the Chocolate Toffee Pie that caught my attention so many years ago, and again this past week.

Although I've learned a substantial amount and grown very steadily as a baker, this recipe has remained consistently the same: rich, chocolatey, sweet, and an absolute crowd-pleaser, whether the crowd be fellow high-school culinary students or fellow adult colleagues looking for a decadent dessert.

Chocolate Toffee Pie

Ingredients:
Crust:
1 ½ cups chocolate wafer crumbs
5 tbsp. unsalted butter, melted
2 tbsp. granulated sugar

Filling:
6 oz. milk chocolate, coarsely chopped
¾ cup heavy cream
8 oz. cream cheese, softened
¼ cup packed brown sugar
1 tbsp. vanilla extract
¾ cup chopped chocolate-covered toffee candy

Directions:
1. Preheat oven to 350. In a medium bowl, combine the wafer crumbs, butter, and sugar. Press the mixture into the bottom of a 9-inch pie plate. Bake for 10 minutes. Place on a wire rack to cool.
2. Place the chocolate in a small bowl. In a small saucepan, bring ½ cup of the cream to a simmer. Pour over the chocolate. Let stand, covered, for five minutes, then stir until smooth.
3. In a medium bowl with an electric mixer, beat the cream cheese, sugar, and vanilla until smooth. Beat in the remaining ¼ cup cream. Gently beat in the cooled chocolate mixture. Fold in ½ cup of the chopped toffee candy.
Pour the filling into the cooled crust, and sprinkle with the remaining ¼ cup of chopped toffee. Chill until firm, about 2 hours.

Thursday, April 2, 2009

The Joy of Cooking with Kids

At a previous job as a bookseller in the children's department of a large bookstore, I learned quite a bit about literature for little ones. Day after day, I was overwhelmed with both nostalgia upon seeing the titles that I had immersed myself in as a kid (one day, I spent my break eating a sandwich and reading “Sideways Stories From Wayside School”) and fascination with all of the new trends that had cropped up since I had roamed the kid's section as a devoted customer. One development that immediately caught my attention, and that has been only rising in popularity, is that of the cookbook for children.


Up until recently, I rarely had the opportunity to work in a kitchen alongside a child; as a baby-sitter and as a relative, I spent most of the time in the kitchen hurriedly preparing simple meals that I could then place in front of the kid, and hope that it would not end up in a mess on the floor. Then, when my baby-sitting days gave way to internships and full-time work, I hardly was around children at all. Of course, that has since drastically changed; my new job is nothing if not full immersion into the world of the elementary-aged, and younger.


So with the ever-increasing prevalence of baking for kids, and with a classroom full of bright-eyed and eager bakers-to-be, I spent this week working on a variety of cooking projects with the five year-olds I work with. The results were simultaneously heart-warming and delicious; each of the recipes turned out very well, thanks in part to their remarkable ease, which is what makes them all perfect for smaller chefs. But what made the experience so ­encouraging for me personally were the reactions of the children in each step of the process and each question that was brought up along the way. The kids were allowed to wear plastic gloves and to measure ingredients, mix and whisk the food together, touch the batters. They truly lent their over-zealous hands to the creation of their desserts. They let out a chorus of “ooooh!” as I blended brownie ingredients together, they cheered when new components were suggested as toppings or additions to the pie, and their looks of excitement as they smelled the melted chocolate in the no-bake cake were unparalleled.


When each dish was completed, and they took their enthusiastic first bites, it was not just that they were eating a yummy treat: they were eating something that they themselves helped to create, which I believe made each dish all the sweeter.

Easy-Peasey Pudding Pie

Ingredients:
1 3.4 oz. box pudding mix, any flavor (vanilla, chocolate, lemon, pistachio, etc.)
1 ¾ cups cold milk
1 ready-made graham cracker pie crust
Toppings (get creative! Strawberries, blueberries, peaches, marshmallows, white chocolate chips, milk chocolate chips, cherries, chocolate sauce, candies...the possibilities are endless)

Directions:
1. In a bowl, whisk together the cold milk and the pudding mix until well-blended.
2. Pour the pudding mixture into the ready-made crust
3. Carefully place your choice of toppings on the pie
4. Refrigerate about 2 hours, then serve.

Microwave Brownies

Courtesy of The Food Network

Ingredients:
½ cup (1 stick) unsalted butter
3 ounces unsweetened chocolate
2 eggs
1 cup sugar
½ cup flour
½ tsp. baking powder
½ tsp. salt
1 tsp. vanilla extract
½ cup chocolate chips

Directions:
1. Put the butter and chocolate into a microwave safe bowl and heat on high for 1 to 2 minutes, stirring every 30 seconds to melt the chocolate. Set aside.
2. In another bowl, whisk together the eggs and sugar.
3. In a large bowl mix the flour with the baking powder and salt. Add the egg and chocolate mixtures along with the vanilla and stir well to combine.
4. Spray an 8-inch square microwave safe glass pan with cooking spray. Pour the batter into the pan, spread it out evenly, and scatter the chocolate chunks on top. Cook on high for 5 minutes. Remove from the oven and let rest for 3 minutes before cutting and eating.

No-Bake Chocolate Cake

Ingredients:
5 oz. milk chocolate
5 oz. semi-sweet chocolate
6 oz. graham crackers
½ cup light corn syrup
½ cup (1 stick) butter
½ cup raisins
1 cup mini marshmallows
(Other possible add-ins are dried apricots, sunflower seeds, pecans, walnuts)

Directions:
1. Prepare an 8-inch square baking dish by lining it with aluminum foil, and lightly spraying with nonstick cooking spray.
2. Place the graham crackers in a sealed plastic bag and crush with a rolling pin until the crackers are in small bite-sized pieces.
3. In a saucepan over low heat, melt together the chocolate, the butter, and the corn syrup. Stir until blended. Remove from heat; add the graham cracker pieces, the raisins, and the marshmallows. Stir to combine.
4. Spoon the mixture into the prepared baking dish and press down until the dish is evenly filled. Refrigerate about 2 hours. Then, serve and enjoy.