Friday, October 30, 2009


Friday, October 9, 2009
Coming Soon - Peace Love Agave
My new blog, Peace Love Agave, will be up and running soon. It will, of course, be a continuation of my celebration of baking, and will center around healthful and delicious desserts. I'm thinking this will be up around the beginning of November. See you soon!
Saturday, September 26, 2009
End of the Sweet Beat era
I cannot fully remember the first time I made a batch of chocolate chip cookies, or the first mixing bowl I ever used in the kitchen, but I do know that I've been baking for at least half of my life. I've felt that every step of the way has been a learning experience, which was the impetus for creating this record of recipes and stories, and over the two years, I've made massive leaps as a baker. After exploring countless cookbooks, patronizing a dizzyingly delicious array of bakeries, and roaming the baking aisles of grocery and specialty stores, I feel that I've found a tradition of baking with which I thoroughly identify and which I support with every beat of batter.
I've found that I can no longer handle mass quantities of butter, shortening, refined sugar, and corn syrup, and I say this without the sometimes-present air of the Pacific Northwest's “only organic, local, fair trade” foodie snobbery, but as a basic fact. The baking that I enjoy to do and to share now revolves around nourishment as well as enjoyment. Therefore, I've decided to re-direct myself and my blog and focus on the baking that matters most to me, hoping that others will be, at the very least, interested in the alternatively sweetened, alternatively grained, alternatively created concoctions I plan on making.
Of course, like any healthy eater, my diet would be incomplete without the occasional foray into more classically or commercially baked goods, and so there will be recipes from time to time that follow the Paula Dean school of cooking. I may love my veggie burgers on whole wheat buns, but every now and then, I like a juicy beef burger with a pile of melty cheese on top. The same goes for dessert; I may normally enjoy my applesauce chocolate chip cookies, but that doesn't mean I will never eat a slice of restaurant chocolate blackout cake again. Dessert is all about celebration, fun, and warmth, and my passion for it continues onward.
The Sweet Beat, as it is in its present form, will be going on a break and possibly ending altogether with this posting. The next months are slightly hectic for me, as next week I'm relocating (yes, again!) to the beautiful and peaceful San Juan Island, not too far from the city of Seattle. I also want to spend time working through my ideas on baking, and the blog which will most likely have a new name and, of course, a new direction (but will hopefully still include Sweet Beat archives).
Thank you for reading The Sweet Beat, and I ask that you join me as I explore this new niche of the baking world. Wholesome baking excites me, it brings me joy, and it leaves me feeling harmonious and well. As you all know, my desire in baking is to share those feelings, along with some scrumptious food, with you all.
Thursday, September 17, 2009
We all eat Gluten-Free Mint Chocolate Cookies
A friend of mine is gluten-sensitive, and although she has been able to eat certain forms of gluten with minimal side effects, on a trial-and-error basis, she explains that she feels her best when she goes off gluten altogether. Though to do so requires a larger amount of diligence on her part, and despite the fact that some wheat-based foods don't sit too badly with her system, she explains that it's a worthwhile endeavor. And I agree! If there's a way to make your body run more smoothly, and make you feel a bit healthier, why not go for it? My lactose-intolerant friends tend to use the same thought process, but occasionally indulge in a bowl of superb ice cream, though they know their stomach will be upset later.
When we discuss our various food intricacies, I've found myself grateful that I need not be on the lookout for entire food categories from which to abstain, for fear of running myself through the wringer. Of course, as my diet has changed over the past year, if I now choose to eat a rich, buttery slice of cake with thick butter cream icing, I know that my system will not be able to handle it as well and my body will not be happy after consuming it. And that's just because I've so drastically reduced the amount of butter and shortening I eat that when I do have some, it turns into an epic event for my digestive system. In that way, I don't feel all that different from my lactose-intolerant or gluten-sensitive.
We create our diets and fall (for better or for worse) into habits that our bodies adapt to, and when something unfamiliar comes along, problems can occur. That reminds me of the “Simpsons” episode when Lisa prepares a green, leafy, vegetarian feast for her normally bacon-and-sausage based family, and everyone but Lisa is sick for days afterwards.
When we discuss our various food intricacies, I've found myself grateful that I need not be on the lookout for entire food categories from which to abstain, for fear of running myself through the wringer. Of course, as my diet has changed over the past year, if I now choose to eat a rich, buttery slice of cake with thick butter cream icing, I know that my system will not be able to handle it as well and my body will not be happy after consuming it. And that's just because I've so drastically reduced the amount of butter and shortening I eat that when I do have some, it turns into an epic event for my digestive system. In that way, I don't feel all that different from my lactose-intolerant or gluten-sensitive.
We create our diets and fall (for better or for worse) into habits that our bodies adapt to, and when something unfamiliar comes along, problems can occur. That reminds me of the “Simpsons” episode when Lisa prepares a green, leafy, vegetarian feast for her normally bacon-and-sausage based family, and everyone but Lisa is sick for days afterwards.
 I wanted to make something special for my gluten-sensitive friend, and I found a gluten-free recipe for mint chocolate cookies, which contain a favorite of mine: Teff flour. These substantial cookies are chewy and a bit on the heavier side, and the mint-chocolate combination are delightfully reminiscent of the Girl Scouts' Thin Mints.
Gluten-Free Mint Chocolate Cookies
Ingredients:
½ cup unsalted butter, softened
½ cup honey
½ tsp. vanilla extract
¼ tsp. mint extract
1 cup Teff flour
¼ cup cocoa powder
Pinch salt
Turbinado (raw) sugar
Directions:
1. Cream together butter and honey. Add vanilla and mint extract. 2. In a separate bowl, combine flour, cocoa powder, and salt. Blend in butter mixture. Place in plastic bag, and shape into a log about 1-1/2" in diameter. Refrigerate for 1 hour or more. Preheat oven to 350°F. 3. Slice refrigerated dough into 18 cookies. Place on buttered baking sheet and top with a sprinkling of Turbinado sugar. Bake for 14-17 minutes, watching carefully to prevent burning.
Monday, September 7, 2009
Autumn's Apple and Raisin Crisp
I know that I will miss the warm summer days and the sweet fruits that were in such abundance over the course of the past few months, but autumn has begun here in the Pacific Northwest, and I could not be happier. This Labor Day weekend was chilly, blustery, overcast, and slightly damp, but I, along with many others I asked, could not be happier with the change of season. The days here have been more dramatic than anything I've seen, with shifts in the clouds and the wind and pockets of sunshine and blue sky. It's an astounding weather pattern to witness, and it makes me feel cozy and humbled. It also brings out my cravings for hot cinnamon cider, warm apple pie, and most basically, apples from the orchard.
It's been ages since I've been to an orchard for apple picking, but I've been delighted to find that I'm close to several apple trees where the apples are simply falling off the branches, and the owners have implored people to come take the fruit and enjoy their deliciousness. And that's precisely what I did. With the help of a fancy apple corer, I made a double batch of Apple and Raisin Crisp for a crowd. They were pleased with the crumbly and cinnamon-scented topping, I was pleased with the combination of raisins (both golden and brown) and apples (I used Granny Smith), and we were all overwhelmed by the homey taste of warm apple crisp on a cool September day.
Apple and Raisin Crisp
Adapted from Epicurious.com
Ingredients:
Topping
1 ¼ cups old-fashioned oats
1 cup plus 2 tablespoons firmly packed brown sugar
¾ cup whole wheat flour flour
1 tsp. ground cinnamon
¼ tsp. salt
¾ cup unsalted butter, room temperature
Filling
3 pounds apples, peeled, cored, sliced
1 ½ cups golden or brown raisins
¼ cup sugar
1 Tbsp. lemon juice
1 Tbsp. whole wheat flour
¾ tsp. ground cinnamon
Directions:
Preheat oven to 375°F. Butter 9 x 13 1/2-inch glass baking dish.
For Topping:Mix old-fashioned oats, brown sugar, all purpose flour, ground cinnamon and salt in large bowl. Add unsalted butter and blend mixture until coarse crumbs form.
For Filling:Combine sliced apples, raisins, sugar, fresh lemon juice, flour and ground cinnamon in large bowl. Mix well to blend. Transfer apple-raisin filling to prepared dish. Spread topping over. Bake until topping is golden brown, about 55 minutes.
It's been ages since I've been to an orchard for apple picking, but I've been delighted to find that I'm close to several apple trees where the apples are simply falling off the branches, and the owners have implored people to come take the fruit and enjoy their deliciousness. And that's precisely what I did. With the help of a fancy apple corer, I made a double batch of Apple and Raisin Crisp for a crowd. They were pleased with the crumbly and cinnamon-scented topping, I was pleased with the combination of raisins (both golden and brown) and apples (I used Granny Smith), and we were all overwhelmed by the homey taste of warm apple crisp on a cool September day.
Apple and Raisin Crisp
Adapted from Epicurious.com
Ingredients:
Topping
1 ¼ cups old-fashioned oats
1 cup plus 2 tablespoons firmly packed brown sugar
¾ cup whole wheat flour flour
1 tsp. ground cinnamon
¼ tsp. salt
¾ cup unsalted butter, room temperature
Filling
3 pounds apples, peeled, cored, sliced
1 ½ cups golden or brown raisins
¼ cup sugar
1 Tbsp. lemon juice
1 Tbsp. whole wheat flour
¾ tsp. ground cinnamon
Directions:
Preheat oven to 375°F. Butter 9 x 13 1/2-inch glass baking dish.
For Topping:Mix old-fashioned oats, brown sugar, all purpose flour, ground cinnamon and salt in large bowl. Add unsalted butter and blend mixture until coarse crumbs form.
For Filling:Combine sliced apples, raisins, sugar, fresh lemon juice, flour and ground cinnamon in large bowl. Mix well to blend. Transfer apple-raisin filling to prepared dish. Spread topping over. Bake until topping is golden brown, about 55 minutes.
Monday, August 31, 2009
Free Cookies at the Islands Village Faire
As I've mentioned many times, a major goal of my baking endeavors is to share what I make with as many people as possible. This weekend, I was given the perfect venue for such promotion of my personal baking brand, and it was amazing.
Not far from Seattle is a set of secluded islands called the San Juans. I've been fortunate enough to spend a good deal of my Pacific Northwest time exploring San Juan Island, and this weekend I participated in their Islands Village Faire. Growing up in Connecticut, then living in New York City, I had never seen such an assortment of people (retirees hand in hand, young families with babies in brightly colored sarongs, fuzzy bearded men, girls in long flowy skirts who looked remarkably just like me) matched with such a sense of community; throughout the Faire, I experienced a heady mixture of peace, serenity, and overall goodwill to my fellow Islander. It was a beautiful thing. And since a major tenant of this Faire, in going along with the theme of community, was bartering, I was able to give away or trade off all of the cookies I had made, spreading the joy that I pompously believe comes with each bite of the cookies I make. I spent a better part of the week mixing batter for my favorite chocolate chip cookies and my Teff peanut butter cookies (the gluten-free kind), and after that hard yet gratifying work, sharing the fruits of my labor with friends and strangers alike was as different to me as it was fulfilling.
 .
.

I'm looking forward to more opportunities to get my cookies out there, so to speak. The San Juan Islands Village Faire was a remarkable step in that endeavor.
Not far from Seattle is a set of secluded islands called the San Juans. I've been fortunate enough to spend a good deal of my Pacific Northwest time exploring San Juan Island, and this weekend I participated in their Islands Village Faire. Growing up in Connecticut, then living in New York City, I had never seen such an assortment of people (retirees hand in hand, young families with babies in brightly colored sarongs, fuzzy bearded men, girls in long flowy skirts who looked remarkably just like me) matched with such a sense of community; throughout the Faire, I experienced a heady mixture of peace, serenity, and overall goodwill to my fellow Islander. It was a beautiful thing. And since a major tenant of this Faire, in going along with the theme of community, was bartering, I was able to give away or trade off all of the cookies I had made, spreading the joy that I pompously believe comes with each bite of the cookies I make. I spent a better part of the week mixing batter for my favorite chocolate chip cookies and my Teff peanut butter cookies (the gluten-free kind), and after that hard yet gratifying work, sharing the fruits of my labor with friends and strangers alike was as different to me as it was fulfilling.
.I'm looking forward to more opportunities to get my cookies out there, so to speak. The San Juan Islands Village Faire was a remarkable step in that endeavor.
Wednesday, August 26, 2009
Figs and Honey
Not long ago my boyfriend and I were invited to dinner at a friend's house, and as was expected, the feast that we enjoyed was full of fresh, local, flavorful ingredients. Our hosts are remarkable gourmets, and so I was not surprised when, as we were chatting before the meal, the dessert was casually explained as “a grilled fig dish with thyme and Gorgonzola that we've been dying to try.” I needed little more description before I, myself, was salivating toward dessert, and wondering how inappropriate it would be to suggest that I make the fig toasts before the main course, so that I could taste them to make sure they were “okay.” Instead, I held my tongue and patiently waited through the delicious main course. As soon as I brought the dinner dishes to the sink, though, my hostess beat me to the punch, exclaiming that it was time to start on the figs.
The recipe, from the Herbfarm Cookbook, is one that she marked and starred afterward; the dish was amazingly light and summery, but bold in taste (from the cheese and the honey). The sweetness of the figs and honey was offset by the Gorgonzola, but I ate a few honey-drizzled figs on their own, and I found them to be more than appetizing. This is a dessert I believe I would see at a fine restaurant, the toasts artfully arranged on fancy china with swizzles of thyme-soaked honey in decorative patterns on the plate. And to be able to make it with my gracious foodie hosts, and to enjoy it on their porch as the sun set on a beautiful August evening, was too sweet for words.
The recipe, from the Herbfarm Cookbook, is one that she marked and starred afterward; the dish was amazingly light and summery, but bold in taste (from the cheese and the honey). The sweetness of the figs and honey was offset by the Gorgonzola, but I ate a few honey-drizzled figs on their own, and I found them to be more than appetizing. This is a dessert I believe I would see at a fine restaurant, the toasts artfully arranged on fancy china with swizzles of thyme-soaked honey in decorative patterns on the plate. And to be able to make it with my gracious foodie hosts, and to enjoy it on their porch as the sun set on a beautiful August evening, was too sweet for words.

Grilled Figs With Thyme, Honey and Gorgonzola Toasts
From The Herbfarm Cookbook
Ingredients:
¼ cup mild or medium-strength honey, such as clover or blackberry
6 sprigs fresh thyme
12 large ripe figs
2 teaspoons extra-virgin olive oil, plus more for brushing
2 teaspoons fresh thyme leaves
1 baguette
6 ounces Gorgonzola cheese, at room temperature
Directions:
Simmer honey in small saucepan, and add thyme sprigs. Let cool for 15 minutes or more while grilling the figs and bread. Start a charcoal fire in an outdoor grill or preheat a gas grill. Cut figs in half, and toss them in a small bowl with 2 teaspoons olive oil and thyme leaves. Set grill rack 4 inches from fire. When the charcoal is ashed over and glowing, or the gas grill is medium-hot, grill figs quickly until they are heated through but not collapsed, 1 to 2 minutes on each side. Transfer to a platter. Cut 24 1/2-inch-thick slices from the bread, and brush both sides lightly with olive oil. Toast bread on both sides on the grill away from direct heat. Spread Gorgonzola cheese on toast, and top with figs. Remove thyme sprigs from honey with a fork and discard, then drizzle honey over figs and toast slices. Serve at once.
Friday, August 21, 2009
Cinnamon Sugar Plum Cake
There are time when I see a recipe that, for some reason, grabs my attention and will not let go until I finally just make it. This is only troublesome when I do not have any occasion to make something like a pie or a cake, since I'm not sure what I would do with a whole dessert sitting on my counter top (other than eat the whole thing myself, of course). So I decided that my co-workers would get to try this Cinnamon Sugar Plum cake this week, and I'm happy for them to try it.
I think perhaps I'm very susceptible to language and the power of suggestion that words can impart, because once I read “sugar plum” in the title of this particular recipe, I was hooked. After brief reflection, I realize that I'm drawn to the warm, Christmas-y connotations of sugar plums, and despite the fact that it is August, and plums are in season now, I simply could not let go of the term “sugar plum.”
And I'm glad that I did not. The cake is fairly simple to make, yes, but the flavors of cinnamon paired with sweet plum are absolutely heavenly, and certainly not season-specific. It is not too heavy for summer, nor is it too lemony for winter. I tried my slice with lemonade, on a warm evening on my balcony, but it would also be lovely with hot cider, sitting in front of the fireplace. The color that the cinnamon lends to the browned cake is also positively gorgeous, and an image that comes to mind when the term "rustic" is used: I could envision this cake on a heavy wooden farm house kitchen table, waiting to be devoured after a large lunch.
The cake also deepened my appreciation for the plum, a fruit I would never think to pick up at the farmer's market. Before buying a few, I did a bit of research on the plum; the plum is high in vitamin C and antioxidants, and there are over 2,000 varieties of plums, with over 100 available in the United States. When buying plums, look for ones that yield to slight pressure and are soft at the tips.
I think perhaps I'm very susceptible to language and the power of suggestion that words can impart, because once I read “sugar plum” in the title of this particular recipe, I was hooked. After brief reflection, I realize that I'm drawn to the warm, Christmas-y connotations of sugar plums, and despite the fact that it is August, and plums are in season now, I simply could not let go of the term “sugar plum.”
And I'm glad that I did not. The cake is fairly simple to make, yes, but the flavors of cinnamon paired with sweet plum are absolutely heavenly, and certainly not season-specific. It is not too heavy for summer, nor is it too lemony for winter. I tried my slice with lemonade, on a warm evening on my balcony, but it would also be lovely with hot cider, sitting in front of the fireplace. The color that the cinnamon lends to the browned cake is also positively gorgeous, and an image that comes to mind when the term "rustic" is used: I could envision this cake on a heavy wooden farm house kitchen table, waiting to be devoured after a large lunch.
The cake also deepened my appreciation for the plum, a fruit I would never think to pick up at the farmer's market. Before buying a few, I did a bit of research on the plum; the plum is high in vitamin C and antioxidants, and there are over 2,000 varieties of plums, with over 100 available in the United States. When buying plums, look for ones that yield to slight pressure and are soft at the tips.

Cinnamon Sugar Plum Cake
From Epicurious.com
Ingredients:
1 ¼ cups all purpose flour
1 tsp. baking powder
¼ tsp. salt
½ cup (1 stick) unsalted butter, room temperature
¾ cup plus 1 1/2 tablespoons sugar
2 large eggs
1 Tbsp. fresh lemon juice
1 tsp. grated lemon peel
4 large plums (about 1 1/4 pounds), pitted, cut into 1/2-inch wedges
½ tsp. ground cinnamon
Directions:
Preheat oven to 350°F. Butter 9-inch-diameter spring form pan. Whisk first 3 ingredients in small bowl to blend. Using electric mixer, beat butter in large bowl until fluffy. Beat in ¾ cup sugar. Add eggs 1 at a time, then lemon juice and lemon peel, beating until blended after each addition. Beat in flour mixture. Spread batter in prepared pan.
Press plum wedges halfway into batter in circles, spacing slightly apart. Mix remaining 1 ½ tablespoons sugar and cinnamon in small bowl; sprinkle over cake. Bake until cake is browned on top and tester inserted into center comes out clean, about 50 minutes. Cut around cake; release pan sides. Serve cake warm or at room temperature.
Tuesday, August 18, 2009
Chocolate and Cherries, Sans Gluten
There are many mix-ins that one can add to a drop cookie recipe: chocolate chips are the first to come to mind, in a variety of cacao levels, then there are raisins and coconut and peanut butter chips and small candies and toffee bits and dried cranberry. Yet, I had not come across any recipes (that come to mind, at least) that called for dried cherries. Then I found this one, and I was initially intrigued by the addition of cherries to a chocolate cookie base, and further excited by the fact that the cookie is gluten-free. I am not, actually, gluten-free, but I know many people who are, and anyway, it's a great way to experiment with the slew of alternative flours that have taken up a permanent residence in my pantry.
I fiddled around with the original recipe a bit, and I came up with a cookie that I think is absolutely decadent. By allowing the cookies to bake a tad longer, the outside gets nice and crisp (of course, be careful not to burn the poor things) and the inside stays slightly fudgey and chewy, with a distinctly brownie-esque texture.
I fiddled around with the original recipe a bit, and I came up with a cookie that I think is absolutely decadent. By allowing the cookies to bake a tad longer, the outside gets nice and crisp (of course, be careful not to burn the poor things) and the inside stays slightly fudgey and chewy, with a distinctly brownie-esque texture.

Gluten-Free Cherry Chocolate Cookies
Ingredients:
½ cup Garbanzo Bean flour
¼ cup potato starch
2 Tbsp. tapioca flour
1 tsp Xanthan Gum
½ cup unsweetened cocoa powder (not Dutch)
1 tsp baking soda
¼ tsp sea salt
½ cup butter
½ cup sugar
1/3 cup brown sugar, packed
1 egg
1 tsp vanilla
½ cup semi-sweet chocolate chips
¼ cup dried cherries (Tart)
Directions:
Preheat oven to 375°F. Grease a large cookie sheet or line with parchment paper (see our website to order); set aside. In a medium bowl, combine the first 7 ingredients (garbanzo bean flour through salt); set aside.With an electric mixer cream butter (room temperature, not melted) with sugars, egg and vanilla until well-combined. Add dry ingredients gradually; mix only until moistened. Fold in chocolate chips and cherries. Roll dough into small balls and place on cookie sheet. Bake 12-13 minutes until puffed and cracked. Cool on baking sheet 5 minutes, then transfer to wire rack to cool.
Wednesday, August 12, 2009
Baking To-Dos
I have a bit of a problem with to-do lists. The issue is not that I am forgetting important tasks or appointments, or that I never know what needs to be done around the apartment or picked up from the store. It is hardly that my life is not managed; the problem lies on the opposite spectrum, in that I feel, at times, that my life is micro-managed. I have task lists for absolutely everything, sprinkled everywhere that I would possibly be on any given day. There are scribbled Post-its on my desk, in my calender, and in my bag, hanging from the bulletin board, and next to my bed. I have a computerized to-do list, a list of books I must read, vacations I must take, and another list of long-term to-dos in a special notebook of mine. Everything is written down, even the things I know I will never forget: “Tuesday, cereal for breakfast.”
It goes without saying, then, that I also have a list of baking to-dos: “Desserts To Bake.” Like many of my lists, it seems to grow faster than I can cross items off, and it doesn't help when I pick up a new cookbook, and then go wild marking pages with even more Post-its.
Since I've been spending most of my baking time lately putting together older favorite recipes, I thought I would expunge myself of a portion of my baking to-do list, and let someone else have fun with some of the recipes that I may, or may not, try at some point in the future.
Gluten-Free Chocolate Zucchini Cake
from Bob's Red Mill Baking Book
Ingredients:
1 cup white rice flour
1 ¼ cups white bean flour
2 tsp. Xanthan Gum
½ cup unsweetened cocoa powder
1 Tbsp. baking powder
1 ½ tsp. baking soda
1 tsp. sea salt
1 tsp. cinnamon
¾ cup soft butter
2 cups sugar
3 eggs
2 tsp. vanilla
2 tsp. grated orange peel
2 cups shredded zucchini
½ cup milk
1 cup walnuts
Directions:
Preheat oven to 325 degrees. Grease and flour a tube pan or loaf pan.In a mixing bowl combine the first 8 ingredients (rice flour through cinnamon), set aside.In another bowl cream together the butter and sugar; add eggs one at a time and vanilla extract, orange peel and zucchini. Stir in, alternately, the flour mixture and milk (or water); add nuts and stir. Pour batter into prepared pan.Bake for approximately 1-1/2 hours; cool with oven door open for 30 minutes. Turn out and cool completely on a wire rack. May be served with or without frosting.
Hazelnut Butter Cookies
from Epicurious.com
Ingredients:
1 ½ cups all purpose flour
¾ teaspoon baking soda
½ teaspoon baking powder
½ teaspoon salt
½ cup (1 stick) unsalted butter, room temperature
1 cup creamy unsalted hazelnut butter
½ cup sugar
½ cup (packed) golden brown sugar
1 large egg
1 teaspoon vanilla extract
1 12-ounce package semisweet mini chocolate chips (2 cups)
Directions:
Sift first 4 ingredients into medium bowl. Using electric mixer, beat butter, hazelnut butter, and both sugars in large bowl until light and fluffy. Beat in egg and vanilla. Beat in flour mixture. Stir in chocolate chips. Cover and refrigerate at least 2 hours. (Can be prepared 1 day ahead. Keep refrigerated. Soften dough slightly at room temperature before shaping.)
Preheat oven to 350°F. Line 2 baking sheets with parchment paper. Using 1 level tablespoon for each cookie, roll dough between palms of hands into 1-inch balls. Arrange 1 inch apart on prepared sheets. Bake 1 sheet at a time until cookies are golden brown, about 12 minutes. Let cool on sheets on racks 5 minutes. Transfer cookies to racks and cool. (Can be made 5 days ahead. Store airtight between sheets of waxed paper at room temperature.)
Peach Cobbler
from The Food Network
Ingredients:
½ cup unsalted butter, melted
1 cup all-purpose flour
2 cups sugar
3 teaspoons baking powder
Pinch salt
1 cup milk
4 cups peeled, pitted and thinly sliced fresh peaches (5 to 6 medium peaches)
1 tablespoon fresh lemon juice
Several dashes ground cinnamon or ground nutmeg (optional)
Directions:
Preheat oven to 375 degrees.
Pour the melted butter into a 13 by 9 by 2-inch baking dish.
In a medium bowl, combine the flour, 1 cup sugar, the baking powder, and the salt and mix well. Stir in the milk, mixing until just combined. Pour this batter over the butter but do not stir them together.
In a small saucepan, combine the peaches, lemon juice, and remaining cup of sugar and bring to a boil over high heat, stirring constantly. Pour the peaches over the batter but do not stir them together. Sprinkle with cinnamon or nutmeg if desired.
Bake in the preheated oven for 40 to 45 minutes or until the top is golden-brown. Serve warm or cold.
Sunday, August 2, 2009
Spicy Blueberry Streusel Bars
On a warm summer night, at a backyard party or barbeque, sometimes the least appealing thing on which to end the evening is a dessert that is dripping with chocolate or butter, heavy enough to capsize a rowboat. For these occasions, I find fruit desserts much more appealing; although I can never get enough of cobblers and crisps, I wanted to try something a bit different (and slightly more portable) for a recent potluck.
The original recipe for these blueberry streusel bars called for an even larger amount of cardamom than is suggested here, and these 2 tablespoons really, in my opinion, max it out. These bars are unique for sure, and the cardamom spice is what gives this cookie variant a hint of the exotic. And using fresh blueberries, there was little need, really, for any other flavoring. This is yet another dessert where the fruit takes the zesty reins, but this time shares the center stage with the spice found in the streusel topping.
The original recipe for these blueberry streusel bars called for an even larger amount of cardamom than is suggested here, and these 2 tablespoons really, in my opinion, max it out. These bars are unique for sure, and the cardamom spice is what gives this cookie variant a hint of the exotic. And using fresh blueberries, there was little need, really, for any other flavoring. This is yet another dessert where the fruit takes the zesty reins, but this time shares the center stage with the spice found in the streusel topping.
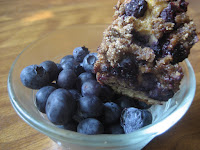
Blueberry Streusel Bars
Ingredients:
1 1/3 cups all-purpose flour
¾ tsp. baking powder
¼ cup (½ stick) unsalted butter at room temperature
½ cup granulated sugar
2 eggs
½ Tbsp. grated lemon zest
¼ cup buttermilk
2 cups blueberries
Topping
½ cup all-purpose flour
¼ cup granulated sugar
2 Tbsp. ground cardamom
½ tsp. ground cinnamon
¼ cup (½ stick) unsalted butter at room temperature
Directions:
1. Preheat oven to 350 degrees. Lightly coat a 9x9 inch baking pan with cooking spray.
2. Whisk the flour and baking powder together and set aside.
3. In a large bowl, combine the butter and sugar. Cream with an electric mixer at medium speed. Reduce speed to low and beat in the eggs, then lemon zest, and lastly the buttermilk.
4. Add the flour mixture and stir with a spoon until fully incorporated. Turn the batter into the prepared baking pan and spread it to cover the bottom evenly. Arrange the blueberries on top in a single layer.
5. For the topping, combine the flour, sugar, and spices in a bowl. Mix well with a fork. Cut in the butter to form crumbs and scatter over the blueberries.
6. Bake about 45 minutes, until a toothpick inserted in the center comes out clean. Cool in the pan on a wire rack.
Wednesday, July 29, 2009
Fresh-from-the-Oven Millet Blueberry Muffins
Despite the rising heat here in Seattle, my baking has also been on the upswing; with a few new cookbooks on my shelf – The New Laurel's Kitchen, Bob's Red Mill Baking Book – and some new ideas about my baking philosophy (don't laugh – like anything else, baking can have a philosophy. And I've been working on mine), I've found it impossible not to be in the kitchen, trying something new out. I'm also at the point where I would much rather share my food, and I'm hoping to find a more business-like way to do so soon. In the meantime, though, I see nothing wrong with a big ceramic bowl with a cloth towel liner, brimming with fresh-baked treats, like these Millet Blueberry Muffins: just what I plan on bringing with me to work today.

The millet gives them a fine and substantial crunch, and the honey leaves them tasting a bit cleaner, and not so sugary. And the blueberries, in my opinion, crown them perfectly. The great thing about these muffins is their versatility: almost anything can be stirred in, instead of blueberries: raisins, walnuts, blackberries or strawberries are the first few that come to mind.
Millet Blueberry Muffins
Ingredients:
2 ¼ cups whole wheat flour
1/3 cup millet
1 tsp. baking powder
1 tsp. baking soda
1 tsp. salt
1 cup buttermilk
1 egg, lightly beaten
¼ c. applesauce
¼ cup honey
1 cup blueberries
Directions:
1. Preheat oven to 400 degrees. Grease or line 16 muffin cups.
2. In a large bowl, mix the whole wheat flour, millet flour, baking powder, baking soda, and salt. 3. In a separate bowl, mix the buttermilk, egg, applesauce, and honey. Stir buttermilk mixture into the flour mixture just until evenly moist. Fold in the blueberries. Transfer batter to the prepared muffin cups.
4. Bake 15 minutes in the preheated oven, or until a toothpick inserted in the center of a muffin comes out clean.
Friday, July 24, 2009
Fresh Raspberry Quick Bread
After the explosion of fresh, fragrant, utterly perfect strawberries last month, I had nearly (but not quite, of course) exhausted myself of eating them. But now that raspberries are the crop du jour, I find myself replacing the strawberries in my diet with these berries, and the result is just as lovely and yummy.

At the market, I'm able to buy raspberries by the half-flat, and I've been busy adding them to my salads and yogurt, freezing them, and naturally, nibbling upon them throughout the day. The next step is to bake with them, and although I've found lots of pies and parfaits that use raspberries, I wanted to try something a little different; a little like the strawberry muffins I made last month. So, not to divert too much, I put together this recipe for Raspberry Quick Bread. I had seen similar recipes that call for bananas as well, but I wanted only the sweet taste of raspberries. That's precisely what I got with this recipe. The honey complements the raspberries well, but if that seems too sweet still, then the honey can be reduced by a couple of tablespoons. Additionally, the bread is quite moist, which I like but others may not prefer. This can be altered by omitting the milk, and keeping a close eye on the bread through the end of its baking time. And the spelt and garbanzo bean flours can, of course, be replaced with whole wheat or other flours, but I find this combination to be perfect in making this a hearty and fiber-filled quick bread that left me satisfied for hours after eating.
Fresh Raspberry Quick Bread
Ingredients:
1 c. spelt flour
¾ c. garbanzo bean flour
1 tsp. baking powder
1 tsp. baking soda
1 ½ tsp. ground cinnamon
¼ tsp. nutmeg
½ c. applesauce
2 eggs, beaten
1 c. honey
1/3 c. milk
2 c. raspberries
Directions:
1. Preheat the oven to 350 degrees.
2. In a large bowl, whisk together the dry ingredients. In a separate bowl, mix the applesauce with the eggs and honey.
3. Blend in the dry ingredients with the wet ingredients alternately with the milk. Fold in the raspberries.
4. Bake for 50-60 minutes, careful not to let it burn. Cool on a wire rack.
Thursday, July 16, 2009
Chewy Honey Cookies
When I saw this recipe for Honey Cookies in my Complete Cookie cookbook, I knew I would want to try it. Under the description, it was stated that these cookies are ideal for making ice cream sandwiches, and although that is not what I personally did, after tasting these, I agree that these would make for one super swell ice cream sandwich. I could see these pairing well with a creamy French Vanilla or strawberry ice cream: a fun treat for a BBQ or pool party.
What I did do, though, was to experiment with the honey flavor. After all, there are an exorbitant amount of flavored honeys that one can try. There is the most well-known clover variety, then there is blackberry, raspberry, lavender, huckleberry, alfalfa, dandelion, fireweed, and many more. Part of the fun in this recipe is that the honey is such a strong player, that whatever type you choose will give your cookies a hint of that particular flavor. And the best thing about flavored honey is that there are no additives to twist the honey one way or another; it's all dependent upon where the bees buzz, and where they are collecting pollen.
The one thing that I would do differently next time, though, would be to lessen the amount of brown sugar. As is, they are very sweet, and I would want the taste of the honey to shine through a bit more. Even still, they are a absolutely delightful.
What I did do, though, was to experiment with the honey flavor. After all, there are an exorbitant amount of flavored honeys that one can try. There is the most well-known clover variety, then there is blackberry, raspberry, lavender, huckleberry, alfalfa, dandelion, fireweed, and many more. Part of the fun in this recipe is that the honey is such a strong player, that whatever type you choose will give your cookies a hint of that particular flavor. And the best thing about flavored honey is that there are no additives to twist the honey one way or another; it's all dependent upon where the bees buzz, and where they are collecting pollen.
The one thing that I would do differently next time, though, would be to lessen the amount of brown sugar. As is, they are very sweet, and I would want the taste of the honey to shine through a bit more. Even still, they are a absolutely delightful.

Chewy Honey Cookies
Ingredients:
1 ½ cups garbanzo bean flour
1 ½ cups brown rice flour
½ tsp. salt
½ tsp. cardamom
1 tsp. cinnamon
1 cup unsalted butter at room temperature
1 cup light brown sugar
½ cup honey
1 large egg yolk
Directions:
1. Whisk together the flours, salt, cardamom, and cinnamon.
2. Cream the butter and the sugars together until light and fluffy. Add the honey and egg yolk and beat for 1 minute. Fold in the flour mixture, ½ cup at a time, to combine. Form the dough into a long log, roll in wax paper, and refrigerate for 4 hours.
3. Preheat the oven to 350 degrees and line cookie sheets with parchment.
4. Cut the log in half and return half to the refrigerator until ready to use. Roll out the dough to a thickness of 1/8 inch. Cut out into 3-inch circles and transfer to the prepared cookie sheets. Repeat with all the dough.
5. Bake for 5 minutes then rotate the cookie sheet and bake for about 5 minutes more, until the edges are golden brown. Let cool on wire racks.
Monday, July 13, 2009
Dessert Night Oatmeal Cake
Whenever I'm given an invitation to a party, my mind quickly wanders to the possibilities of the type of food I can bring; if it is a dinner party, then what dessert can I make? If it is a brunch, then what dessert can I make? If I'm going to a child's birthday party, then what dessert can I make?
Although, like anyone else, I love a nourishing, filling, and delicious meal, I generally am more concerned with what will follow the main course and appetizers. So this past weekend, when I was invited to a “dinner for dessert” party, I was overcome with two emotions: the first was of excitement. Finally, an event that that celebrated the very thing I take the most pleasure in! But as my eyes widened and I unconsciously began salivating, I also began to worry; what could I bring that would stand out, that would not get lost in the delectable crowd of other desserts? My first instinct was to make a rustic berry cobbler or crisp; after all, it's what's in season. But then I backpedaled, thinking that everyone would naturally be taking advantage of the spectacular berries the Pacific Northwest has been savoring. Then, I considered chocolate: anything at all that was chocolate. But again, I had my reservations: I had just recently made a very chocolatey, very rich dessert, and I had hoped for a bit more variety in my baking practice.
So after a bit of consultation and research, I found the perfect dessert: a hearty oatmeal cake with a brown sugar glaze. And it did turn out to be along just the right track; though the only cobbler to be found at the table was a mango cobbler, chocolate was the key ingredient of the night. While I took part in tasting a bit of everything there, I also enjoyed a piece of my cake, which offered a great balance to the other desserts.
The brown sugar along with the honey (or agave nectar) make for a sweet cake, but the whole wheat flour and the oats give it a substance that a purely sugary treat would not possess. The coconut in the glaze added a pleasant texture, and the glaze is best poured on the cake while both are still warm, so that the cake can soak up the moisture of the mixture – without becoming soggy itself. My friends were just as happy with the oatmeal cake as I was; it's just right for grabbing a piece and eating with your fingers, if your plate happens to already by weighed down by a selection of other desserts.

Oatmeal Cake
Although, like anyone else, I love a nourishing, filling, and delicious meal, I generally am more concerned with what will follow the main course and appetizers. So this past weekend, when I was invited to a “dinner for dessert” party, I was overcome with two emotions: the first was of excitement. Finally, an event that that celebrated the very thing I take the most pleasure in! But as my eyes widened and I unconsciously began salivating, I also began to worry; what could I bring that would stand out, that would not get lost in the delectable crowd of other desserts? My first instinct was to make a rustic berry cobbler or crisp; after all, it's what's in season. But then I backpedaled, thinking that everyone would naturally be taking advantage of the spectacular berries the Pacific Northwest has been savoring. Then, I considered chocolate: anything at all that was chocolate. But again, I had my reservations: I had just recently made a very chocolatey, very rich dessert, and I had hoped for a bit more variety in my baking practice.
So after a bit of consultation and research, I found the perfect dessert: a hearty oatmeal cake with a brown sugar glaze. And it did turn out to be along just the right track; though the only cobbler to be found at the table was a mango cobbler, chocolate was the key ingredient of the night. While I took part in tasting a bit of everything there, I also enjoyed a piece of my cake, which offered a great balance to the other desserts.
The brown sugar along with the honey (or agave nectar) make for a sweet cake, but the whole wheat flour and the oats give it a substance that a purely sugary treat would not possess. The coconut in the glaze added a pleasant texture, and the glaze is best poured on the cake while both are still warm, so that the cake can soak up the moisture of the mixture – without becoming soggy itself. My friends were just as happy with the oatmeal cake as I was; it's just right for grabbing a piece and eating with your fingers, if your plate happens to already by weighed down by a selection of other desserts.
Oatmeal Cake
Ingredients:
1 ½ cups boiling water
1 cup oats
1 cup Raisins
½ cup applesauce
1 cup brown sugar, packed
½ cup honey or agave nectar
2 large eggs, well beaten
1 ½ cups sifted whole wheat flour
1 tsp. cinnamon
1 tsp. baking soda
1/2 tsp. sea salt
Topping:
1 stick butter
1 cup brown sugar, packed
2 ½ tbsp. canned evaporated milk
½ cup coconut flakes
½ cup chopped pecan halves
Directions:
Preheat oven to 350°. Grease a 13" x 9" x 2" baking pan, set aside.
Directions:In a mixing bowl combine boiling water, quick rolled oats and raisins, set aside to cool.In a separate mixing bowl cream together the applesauce, brown sugar, honey and eggs.In another mixing bowl sift together whole wheat flour, cinnamon, baking soda and sea salt, add to sugar mixture, add oatmeal-raisin mixture, blend well.Bake at 350° for 40-50 minutes or until done. Spread with topping while cake is hot.
Saturday, July 11, 2009
Sage Biscuits with Ancient Grain
I've become quite a fan of Amaranth flour. Amaranth is an ancient Aztec grain that comes from an annual related to spinach and swiss chard, high starch content, and rich in protein, iron, and calcium. It works best when combined with other flours, as it can have an overly grainy texture on its own; I discovered this while experimenting with Amaranth pancakes.
I thought that this would be the perfect type of flour to use for a savory, satisfying breakfast pastry. Although I'm not much for the overly buttery and flaky variety of biscuits, I wanted to see if I could create something a tad more wholesome. I did some research, and I found two biscuit recipes that were intriguing, but not precisely what I was hoping for. So, I picked and chose a few key pieces from each and put them together into this variation. And these sage biscuits, while certainly not the buttermilk biscuits of the South, are soft, aromatic, and absolutely perfect served warm. I brought a dozen of them to a brunch, where they accompanied fresh fruit and yogurt, and I couldn't have been more pleased with how well they went with a lighter spread of food; they did not overwhelm, but also left no one wanting for a more filling alternative.
I thought that this would be the perfect type of flour to use for a savory, satisfying breakfast pastry. Although I'm not much for the overly buttery and flaky variety of biscuits, I wanted to see if I could create something a tad more wholesome. I did some research, and I found two biscuit recipes that were intriguing, but not precisely what I was hoping for. So, I picked and chose a few key pieces from each and put them together into this variation. And these sage biscuits, while certainly not the buttermilk biscuits of the South, are soft, aromatic, and absolutely perfect served warm. I brought a dozen of them to a brunch, where they accompanied fresh fruit and yogurt, and I couldn't have been more pleased with how well they went with a lighter spread of food; they did not overwhelm, but also left no one wanting for a more filling alternative.

Sage Biscuits
Ingredients:
1 cup rice flour
1 cup Amaranth flour
2 tsp. baking powder
½ tsp. baking soda
1 tsp. sugar
½ tsp. salt
2 tbsp. finely chopped sage
8 tbsp. (1 stick) cold unsalted butter, cut into cubes
¾ cup buttermilk
Directions:
1. Preheat the oven to 450 degrees and set oven rack to middle position.
2. Whisk together flours, baking powder, baking soda, sugar, salt, and sage.
3. Using a pastry blender or your fingers, cut the butter into the mixture until it becomes a course meal.
4. Stir in the buttermilk until the mixture forms a sticky ball.
Transfer the dough to a lightly floured surface and form into a ball. Divide the dough into quarters, then cut the quarters into thirds. Shape each piece into a rough ball and place on an ungreased cookie sheet.
5. Bake 10-12 minutes, until tops of the biscuits are browned.
Tuesday, July 7, 2009
Alternative Baking with Blueberry Rhubarb Crisp
I don't think I would have necessarily sought out a variety of gluten-free recipes on my own; after all, my body and my diet are both very gluten-friendly. But when I was given a gift of flours for my birthday, I realized what a wide world of baking there is beyond the “unbleached white” or even “whole-wheat pastry flour.” Using alternative grains is an absolute art in baking, and a very nourishing one, too. Many alternative grains, such as Kamut or Teff flour, are filled with protein and a host of vitamins.
Generally, gluten-free or alternative grain desserts are not necessarily “healthy,” due to the butter or sugar. But, this can be remedied with alternative sweeteners and butter replacements. From my experience with alternative and healthful baked goods I've bought, and the ones I've made myself, I much prefer the wholesome ones to the full-fat kind (yes, even my birthday cake was a bit too much butter and sugar for me to handle).
I would never look down upon any baked good, regardless of its nutritional content; however, if I'm going to be baking as often as I do, for all of the people I care so deeply about, why not make something that is actually good and satisfying for the body, as well as the soul?
This Blueberry Rhubarb Crisp definitely qualifies for these condition: sweet and tangy, and with a topping that does not overwhelm the natural flavors of the blueberry and rhubarb. And of course, if you do not want to make it with the alternative grains, then it's just fine to use whatever you have in your kitchen.
Blueberry Rhubarb Crisp
From Bob's Red Mill Baking Book
Ingredients:
Topping:
¼ cup Amaranth flour
¼ cup Teff, soy or barley flour
½ cup brown sugar, packed
½ teaspoon ground cinnamon
¼ teaspoon ground nutmeg
5 tablespoons unsalted butter, chilled and diced
Filling:
¼ cup honey
¼ teaspoon ground cinnamon
2 tablespoons Teff flour
2 cups (about 3/4 pound) rhubarb, cut into 1/2 inch pieces
2 cups blueberries
Directions:
1. Preheat the oven to 375 degrees and grease a 2-quart shallow baking dish.
2. For the topping, combine the flours, brown sugar, cinnamon, and nutmeg in a small bowl. Add the butter and work it into the flour mixture with your fingers until crumbly. Refrigerate while making the filling.
3. In a small bowl, stir together the honey, cinnamon, and flour. Add the rhubarb and blueberries, tossing well. Spread the mixture in the prepared baking dish. Sprinkle topping over the fruit and bake for 35 to 40 minutes, until the topping is brown and the fruit is bubbling. Serve warm.
Saturday, July 4, 2009
More Muffins: Carrot Raisin
I recently mentioned how my muffin baking is sparse and slightly erratic, but after my fantastic strawberry muffin success, I'm falling more in love with muffins. What I especially like about homemade muffins is the amount of control I have over the ingredients, and therefore, the taste and health quotient. I'm not a fan of the jumbo bakery muffins, loaded with butter or oil, and I've never understood the allure of chocolate muffins (just make cupcakes if you want to use cocoa powder!). But the muffin recipes I have my sight set on call for alternative sweeteners, like the honey used here, and hearty flours, and flavorful add-ins. These carrot raisin muffins are adapted by me from a basic rice muffin recipe I found; at first, regular sugar was called for, but I found that honey works better with sweetening, without being overbearing and heavy. The cinnamon and nutmeg work well with the raisins, and the carrots add a freshness that could be acquired with zucchini, or shredded apple perhaps. No matter what is stirred into this muffin base, I'm certain that they will turn out as light and tasty as these ones did.

Carrot Raisin Muffins
Yield: 1 dozen
Ingredients:
2 tbsp. canola oil
2 eggs
½ cup milk
½ tsp. vanilla extract
¼ cup honey
1 ½ cup rice flour
½ tsp. salt
2 tsp. baking powder
2 tsp. cream of tartar
1 tsp. cinnamon
¼ tsp. fresh nutmeg
½ cup raisins
1 cup shredded carrots
Directions:
1. Preheat oven to 350 degrees. Line or grease muffin tins.
2. Mix butter and honey. Beat in eggs.
3. Mix together flour, salt, baking powder, cream of tartar, cinnamon, and nutmeg. Add flour mixture to egg mixture alternately with milk. Add vanilla. Stir in raisins and carrots. Pour into muffin tins and bake for 18-20 minutes
Wednesday, July 1, 2009
Happy Chocolate Cake-with-Vanilla-Buttercream-and-Strawberries Birthday to Me!
This past Sunday was my birthday, and I celebrated in one of the most joyful ways I know how: I baked, and then shared my dessert with good friends.

Most people want to enjoy their favorite cake on their birthday, whether it be a basic vanilla with vanilla icing, a complex Italian specialty, a festive ice cream cake, and any other cake one can imagine. No matter what kind of bakery you frequent, you can find a birthday cake, or similar stand-in (for example: birthday tortes, birthday muffins, birthday pies). I also know a good number of individuals who prefer to bake their own favorite creation, whether it be a birthday dessert or a very special main meal, for their birthdays; I obviously find this to be the better option for me. In fact, cookbooks featuring only recipes for birthday cakes have been written (to be honest, my roommate owns one, and it sits proudly on our cookbook shelf), and while I did not pull my birthday cake recipe from this volume, it is filled with imaginative concoctions, all of which are incomplete without candles on top. The recipe, from Epicurious, is not terribly complex, but like any layer cake, it is time consuming, and special attention is required if it is to turn out well.
My dream birthday cake was chocolate with vanilla buttercream, and to my joy, it has became a delicious reality. I made it over the course of two days, making the cake a day before the birthday celebration, and letting it cool, then wrapping it in plastic wrap. The frosting, I made the morning of, and then I assembled the entire thing a few hours before we cut it. The cake was everything I wanted it to be: lusciously chocolatey, achingly sugary, and blissfully tasty: the perfect treat to look forward to once a year.
Chocolate Cake with Vanilla Buttercream Frosting
From Epicurious.com
Ingredients:
1 cup boiling-hot water
3/4 cup unsweetened cocoa powder
1/2 cup whole milk
1 teaspoon vanilla
2 cups all-purpose flour
1 1/2 teaspoons baking soda
Rounded 1/2 teaspoon salt
2 sticks (1 cup) unsalted butter, softened
2 cups packed dark brown sugar
4 large eggs at room temperature for 30 minutes
4 cups vanilla buttercream
The Cake:
1. Put oven rack in middle position and preheat oven to 350°F. Butter 2 (9- by 2-inch) round cake pans and line bottom of each with a round of wax paper. Butter paper and dust pans with flour, knocking out excess. Whisk together hot water and cocoa powder in a bowl until smooth, then whisk in milk and vanilla.
2. Whisk together flour, baking soda, and salt in another bowl.
3. Beat together butter and brown sugar in a large bowl with an electric mixer at medium-high speed until pale and fluffy, 3 to 5 minutes. Add eggs 1 at a time, beating well after each addition. Reduce speed to low and add flour and cocoa mixtures alternately in batches, beginning and ending with flour mixture.
4. Divide batter between cake pans, smoothing tops. Bake until a wooden pick or skewer comes out clean and edges of cake begin to pull away from sides of pans, 30 to 35 minutes total. Cool layers in pans on racks 10 minutes, then invert onto racks, removing wax paper, and cool completely.
Vanilla Buttercream
Ingredients:
3 cups confectioners' sugar
1 cup butter
1 teaspoon vanilla extract
2 tablespoons whipping cream
Directions:
With a hand mixer or stand, mix together sugar and butter. Mix on low speed until well blended and then increase speed to medium and beat for another 3 minutes.
Add vanilla and cream and continue to beat on medium speed for 1 minute more, adding more cream if needed for spreading consistency.
To assemble cake:
Put 1 cake layer, rounded side up, on a cake stand or platter and, using offset spatula, spread top with about 1 cup buttercream. Top with remaining cake layer, rounded side down, and frost side and top of cake with 2 cups buttercream.
Friday, June 26, 2009
June's Sweet Bounty: Strawberry Muffins
I have one particular go-to muffin recipe that I discovered about a year ago and have subsequently enjoyed through all months of the year. They're blueberry muffins, calling for frozen blueberries, which are available at the store whenever the mood to purchase them strikes my fancy. Because I don't bake muffins very often, I've never been inspired to find a recipe that takes advantage of fresh seasonal produce. Then, I recently found this recipe for strawberry muffins. The ingredient list specifies fresh strawberries are needed, and given how glorious these Pacific Northwest berries have been tasting the past couple of weeks, it was impossible not to make these immediately.
 It turns out that I was right to do so. These muffins, found in the magazine Body and Soul are a divine breakfast wake-up call. Not laden with a host of various flavors and textures, the berries have the opportunity to be center stage; and as with any dish, when the key player is fresh, local, and of high quality, then there is no possibility for failure (or great failure, anyway). The buttermilk adds a down-home quality to the muffins without making them heavy, and the whole wheat flour makes them slightly more fiber-filled. And they are a light and sweet morning treat with a vibrant strawberry essence.
It turns out that I was right to do so. These muffins, found in the magazine Body and Soul are a divine breakfast wake-up call. Not laden with a host of various flavors and textures, the berries have the opportunity to be center stage; and as with any dish, when the key player is fresh, local, and of high quality, then there is no possibility for failure (or great failure, anyway). The buttermilk adds a down-home quality to the muffins without making them heavy, and the whole wheat flour makes them slightly more fiber-filled. And they are a light and sweet morning treat with a vibrant strawberry essence.Although I know I will pull out the recipe book for my blueberry muffins come autumn, while the season allows, I believe I've found a new go-to muffin recipe.
Strawberry Muffins
Yield: 1 dozen
Ingredients:
1 ½ cups sliced strawberries
1/3 cup plus 1tbsp. sugar
1 ¼ cups all-purpose flour
½ cup whole-wheat flour
2 tsp. baking powder
½ tsp. baking soda
½ tsp. salt
½ tsp. ground cinnamon
1 cup low-fat buttermilk
¼ cup vegetable oil
1 large egg
1 tsp. vanilla extract
Directions:
Preheat oven to 400 degrees. Line a 12-cup muffin tin with paper liners. Toss together strawberries and 1/3 cup sugar. Using a potato masher, lightly mash berries; set aside.
In a large bowl, whisk together flours, baking powder, baking soda, salt, and cinnamon. In a medium bowl, combine buttermilk, oil, egg, and vanilla. Whisk to combine.
Make a well in the center of the flour mixture and pour in the buttermilk mixture and berry mixture (with juice). Fold until just combined. Divide the batter among the muffin cups. Sprinkle the tops with remaining sugar.
Bake until a toothpick inserted in the center of a muffin comes out clean, about 17 minutes. Cool 5 minutes in the pan, then transfer to a wire rack to cool completely.
Subscribe to:
Posts (Atom)